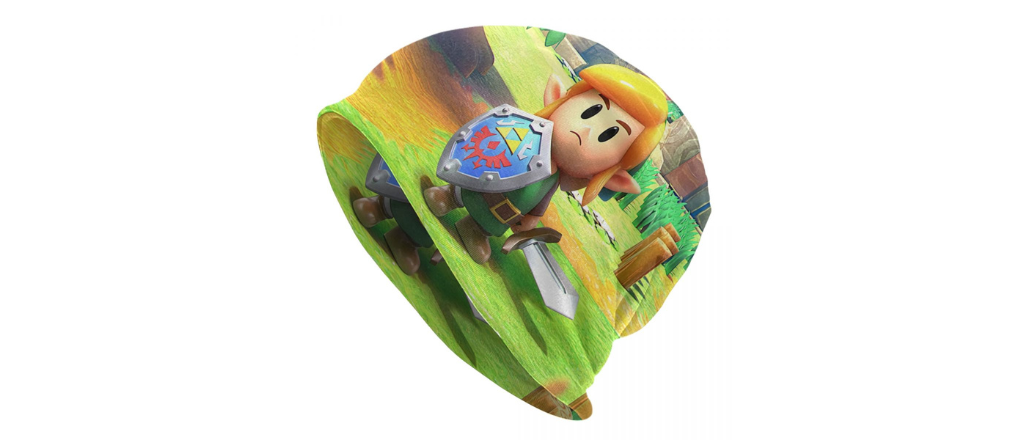
If you’ve just started your adventure in The Legend of Zelda: Tears of the Kingdom, you’re probably wondering when you’ll meet the adorable young Rito warrior who’s destined to become one of your most valuable allies. Tulin isn’t just another NPC – he’s one of the five Sages you’ll recruit, and honestly, his wind ability might just become your most-used power throughout the entire game. I’ve spent countless hours exploring every corner of Hyrule, and I can tell you that getting Tulin early on will completely change how you approach exploration and combat.
In this complete walkthrough, I’ll guide you through every step needed to unlock Tulin as your companion, from your first meeting in Rito Village to that epic moment when he awakens as the Sage of Wind. Trust me, by the end of this journey, you’ll understand why so many players consider Tulin the best Sage in the game. Let’s dive into this fantastic questline that takes you soaring through the skies of Hyrule.
When Can You Start Tulin’s Quest?
Before we get into the nitty-gritty details, let’s talk about timing. You can actually encounter Tulin relatively early in your Tears of the Kingdom playthrough, which is fantastic news for players who want to grab that wind ability as soon as possible. After completing the initial tutorial on the Great Sky Island and making your way back to Hyrule’s surface, you’ll need to head to Lookout Landing and speak with Purah.
Understanding the Regional Phenomena Quest
Purah will give you the “Regional Phenomena” main quest, which is your gateway to all four major regional questlines. This is where the game really opens up and lets you choose your own path. You can tackle the regions in any order you want – Rito Village, Goron City, Zora’s Domain, or Gerudo Town. Each region has its own crisis and its own Sage to recruit, but I’m going to make a case for why you should prioritize the Rito questline first.
The beauty of Tears of the Kingdom’s open-ended design means you could theoretically rush straight to Rito Village at any point after leaving the Great Sky Island. However, I’d recommend having at least four or five hearts and some decent cold-resistant gear or food before making the trek. The Hebra region where the Rito live is freezing, and you’ll need protection from the cold to survive the journey and the battles ahead.
Recommended Preparation Level
I know the temptation is real to sprint straight to Rito Village, especially if you loved the Rito characters from Breath of the Wild. But here’s my honest advice based on multiple playthroughs: take some time to explore the starting areas around Hyrule Field first. Grab a few Skyview Towers to unlock portions of your map, complete some shrines to increase your stamina and health, and gather basic materials. You don’t need to be overpowered, but having a solid foundation will make Tulin’s questline much more enjoyable and less frustrating.

Why You Should Get Tulin First
Let me be real with you – while you can tackle the Sages in any order, there are some seriously compelling reasons to make Tulin your first companion. I’ve completed this game multiple times, trying different routes each time, and the playthroughs where I got Tulin first were consistently the smoothest and most enjoyable experiences.
Tulin’s Gust Ability Changes Everything
Tulin’s Gust ability is an absolute game-changer for exploration. Once you have him as your Sage companion, he can create powerful wind currents that launch you into the air. This synergizes perfectly with your paraglider, allowing you to gain altitude almost anywhere, anytime. Think about how often you need vertical mobility in Tears of the Kingdom – whether you’re climbing mountains, reaching Sky Islands, or just trying to scout your surroundings. Tulin makes all of this infinitely easier.
Compare this to the other Sage abilities, and you’ll see why Tulin stands out. Yunobo’s rolling attack is great for combat and breaking rocks, sure. Sidon’s water shield is helpful for defense. Riju’s lightning is powerful against enemies. But none of them fundamentally change how you navigate the world like Tulin does. His ability isn’t just useful in specific situations – it’s useful everywhere, all the time.
The Rito Questline is Beginner-Friendly
Another reason I recommend tackling the Rito Village questline first is that it’s genuinely one of the more accessible regional quests. The Wind Temple dungeon isn’t overwhelmingly difficult, and the puzzles strike a perfect balance between challenging and fair. If you’re still getting used to Tears of the Kingdom’s mechanics, this is a fantastic place to cut your teeth before moving on to some of the trickier dungeons like the Fire Temple or Lightning Temple.
The enemies you’ll face in the Hebra region are also relatively manageable compared to some other areas. You’ll deal with Ice Lizalfos, some Aerocudas, and frozen enemies, but nothing that will completely wreck you if you come prepared with warm clothes and decent weapons. The difficulty curve feels just right for a first regional quest, easing you into the game’s combat systems without throwing you into the deep end.
Story and Character Development
From a narrative perspective, the Rito questline is also incredibly satisfying. Tulin’s character arc is one of the most well-developed in the game. You’ll watch this eager young Rito go from an impulsive kid trying to prove himself to a genuine hero who earns his place among the Sages. The story touches on themes of legacy, responsibility, and growing up, with some beautiful callbacks to Revali from Breath of the Wild that long-time fans will absolutely love.
The emotional beats hit differently when Tulin is your first Sage too. You’re experiencing the revelation of what the Sages are and their connection to the ancient past for the first time, and the Rito Village questline delivers these story moments with real impact. Later regional quests assume you already understand the basic premise, so they don’t have quite the same sense of discovery.

Preparing for Your Journey to Rito Village
Alright, you’re convinced – you want to get Tulin first. Smart choice! Now let’s make sure you’re actually ready for the journey ahead. The Hebra region is unforgiving if you show up unprepared, but with the right gear and items, you’ll breeze through.
Cold Resistance: Your Top Priority
The Hebra Mountains are absolutely freezing, and I mean that literally. Without cold resistance, you’ll constantly lose hearts, which makes exploration and combat unnecessarily difficult. You have several options for dealing with the cold, and I recommend using a combination of methods to ensure you’re always protected.
Option 1: Cook Cold-Resistant Food
The easiest early-game solution is cooking Spicy Peppers into dishes. You can find Spicy Peppers growing around the starting area near the Temple of Time ruins on the Great Sky Island, and they also grow in various locations throughout Hyrule Field. Cook just one Spicy Pepper by itself for basic cold resistance that lasts a few minutes, or combine multiple peppers or add them to other ingredients for longer-lasting effects.
My go-to recipe for extended cold resistance is combining Spicy Peppers with Raw Meat. This gives you both the cold resistance buff and some heart recovery, which is incredibly useful. Another great option is using Sunshrooms, which you can find in caves throughout Hyrule. A dish made from Sunshrooms provides cold resistance and is easy to mass-produce once you find a good farming spot.
Option 2: Acquire the Snowquill Armor Set
If you want a more permanent solution, head to Rito Village and visit the armor shop called the Brazen Beak. They sell the Snowquill Set, which includes the Snowquill Headdress, Snowquill Tunic, and Snowquill Trousers. Each piece provides one level of cold resistance, and wearing the full set gives you unfreezable status, which is incredibly helpful.
The catch? This armor is expensive. Each piece costs 650 rupees for the headdress, 1000 rupees for the tunic, and 550 rupees for the trousers. That’s 2,200 rupees total for the complete set. If you’re early in the game, you probably don’t have that kind of cash lying around. My recommendation is to buy at least the tunic first, as it provides the most protection, then supplement with cooked food until you can afford the rest.
Option 3: Use Elixirs and Other Buffs
Don’t sleep on elixirs as an alternative to food. You can create cold-resistant elixirs by cooking Warm Darners (butterflies that glow orange) or Summerwing Butterflies with monster parts. These insects are found in warmer regions of Hyrule, particularly around Eldin and the Gerudo Desert areas. The elixirs last longer than most foods and don’t use up your valuable cooking ingredients.
Weapons and Combat Preparation
While the Hebra region isn’t the most difficult area in terms of combat, you still want to bring decent weapons. I recommend having at least a few weapons in the 20-30 damage range before heading out. You don’t need anything crazy powerful, but those rusty Soldier’s Broadswords from the starting area probably won’t cut it anymore.
What to Bring in Your Arsenal
Focus on gathering a variety of weapon types. Bring some one-handed swords for versatile combat, at least one two-handed weapon for dealing heavy damage to tougher enemies, and definitely pack a bow with plenty of arrows. Aerial combat plays a significant role in the Rito questline, and you’ll be grateful to have ranged options when fighting enemies in the sky.
Speaking of arrows, stock up! Aim for at least 50 arrows before you leave for Rito Village. You can buy arrows from shops, find them in chests, or pick them up after battles. The Flying combat sequences require good aim and plenty of ammunition, so don’t skimp on this preparation step.
Fuse Materials That Synergize With Cold
Here’s a pro tip that many players overlook: certain Fuse materials work exceptionally well in cold environments. Ice Lizalfos horns and Ice Like stones create weapons that deal freeze damage, which is obviously redundant against frozen enemies but fantastic against the fire-breathing aerocudas and other non-ice creatures you’ll encounter.
Conversely, consider fusing Ruby gems to your weapons. Rubies create fire-based attacks that are super effective against ice enemies, and they also provide a small amount of warmth when equipped. It’s a small bonus, but every bit helps when you’re exploring the frozen peaks of Hebra.
Stock Up on Healing Items
Combat in the sky can be unpredictable, and you want to make sure you have plenty of healing available. I recommend bringing at least 10-15 full heart recovery meals before starting Tulin’s questline. You can cook simple dishes like Hearty Radishes (which fully restore health and add temporary hearts) or create more complex recipes with multiple ingredients for maximum healing.
Don’t forget about Fairies either! These little helpers automatically revive you if you die, which can be a lifesaver during tough boss fights. You can find fairies near Great Fairy Fountains or sometimes in wooded areas. Catching four or five fairies before your journey gives you multiple second chances if things go wrong.
Getting to Rito Village: The Journey North
Once you’re properly equipped and prepared, it’s time to make the actual journey to Rito Village. The path to Rito Village from central Hyrule is relatively straightforward, but there are a few routes you can take, and some are definitely better than others.
The Recommended Route From Lookout Landing
Starting from Lookout Landing, head northwest toward the Hebra region. You’ll want to follow the main road that leads through the Outskirt Stable area. This path is well-traveled and relatively safe, making it ideal for newer players. Along the way, you’ll pass through various interesting locations where you can stop to gather materials, complete shrines, or just enjoy the scenery.
As you continue northwest, you’ll start noticing the terrain getting rockier and the temperature dropping. This is your signal to make sure your cold resistance is active. The road will eventually lead you toward Tabantha Bridge Stable, which is an excellent checkpoint to rest, cook, and prepare for the final push into Hebra.
Alternative Routes and Shortcuts
If you’re feeling adventurous or want to explore alternative paths, you can approach Rito Village from the west through the Tabantha Frontier region. This route takes you through some beautiful landscapes and interesting ruins, though it can be slightly more dangerous due to the enemy camps scattered throughout the area.
Another option is using the Skyview Tower system to your advantage. If you’ve already unlocked the Lindor’s Brow Skyview Tower west of Hyrule Castle, you can launch yourself high into the air and then paraglide northwest toward Rito Village. This requires good stamina management and the ability to navigate while airborne, but it’s by far the fastest method once you get the hang of it.
What to Expect on the Road
During your journey, you’ll encounter various enemies and wildlife. Bokoblins and Moblins have camps along the roads, but they’re generally easy to avoid if you don’t want to fight. You might also run into some Aerocudas – those flying octopus-like creatures that spit rocks at you. These are actually great practice for the aerial combat you’ll be doing later in Tulin’s questline, so don’t be afraid to engage with them.
Keep an eye out for caves and wells along the way. These often contain valuable materials, weapons, and even shrines. I always make it a point to explore any caves I pass because they frequently have mineral deposits and Bubbulfrogs, which drop Bubbul Gems that you can trade for unique rewards.
Activating the Rospro Pass Skyview Tower
As you get closer to Rito Village, you’ll come across the Rospro Pass Skyview Tower. This tower is partially frozen and requires you to solve a small puzzle to activate it, but it’s absolutely worth doing. Once activated, it reveals a huge chunk of the Hebra region on your map and serves as a fast travel point for future visits.
To solve the Rospro Pass tower puzzle, you’ll need to melt the ice covering the entrance. You can do this by using fire fruits, fire-based weapons, or even by carrying a lit torch to the frozen areas. Some players get creative and build contraptions with nearby materials, but honestly, the simplest solution is usually the best – just light a campfire or use fire arrows.
Arriving at Rito Village: Your First Impressions
The moment you first see Rito Village rising from the central pillar of rock, surrounded by those distinctive spiraling platforms, you’ll understand why so many players fall in love with this location. It’s visually stunning, especially with the way it’s designed vertically rather than horizontally like most settlements. The architecture is uniquely Rito, with wooden platforms connected by ladders and updrafts that let the bird-like inhabitants fly between levels effortlessly.
Exploring the Village Layout
Rito Village is built around a central stone spire with multiple levels of wooden platforms spiraling upward. The general store, armor shop, and most of the villagers are on the middle levels, while the elder’s dwelling sits at the very top. There’s also a flight range on one of the outer platforms where you can practice your aerial skills, though you’ll get plenty of practice soon enough.
Take some time to talk to the villagers when you first arrive. The Rito are wonderful characters with distinct personalities, and many of them have interesting things to say about the crisis affecting their village. You’ll notice immediately that something is wrong – there’s a blizzard constantly raging around the village, and the Rito are clearly distressed about it. This unnatural storm is the regional phenomenon that Purah sent you to investigate.
Meeting the Key Characters
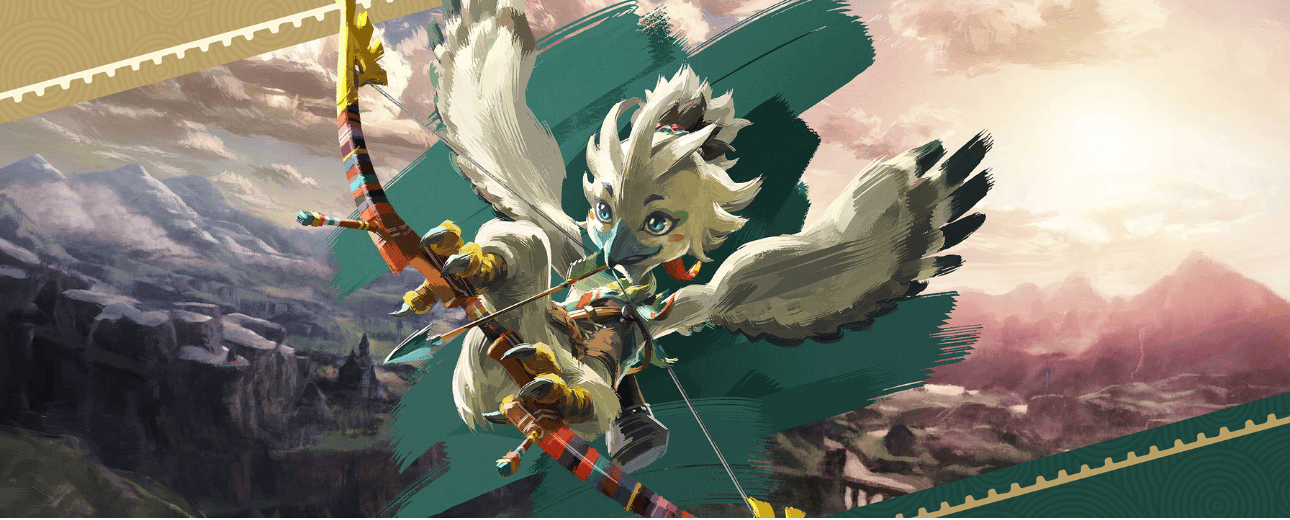
As you explore the village, you’ll meet several important characters. Teba, who you might remember from Breath of the Wild, is still around and plays a role in the story. The village elder Kaneli is also present, though he’s quite elderly now. But the character you’re really here to meet is Tulin, Teba’s son and the young Rito who will become your Sage companion.
You’ll find Tulin near the general store area, and he’s impossible to miss – he’s an enthusiastic young Rito with boundless energy and a strong desire to prove himself. When you first talk to him, he’ll be concerned about the blizzard and eager to do something about it. This conversation kicks off the questline that will eventually lead you to the Wind Temple and Tulin’s awakening as a Sage.
Stocking Up on Supplies
Before diving into the main quest, I highly recommend taking advantage of Rito Village’s shops. The general store sells arrows, which you’ll definitely need, along with various cooking ingredients. The Brazen Beak armor shop has the Snowquill Set I mentioned earlier, which provides excellent cold resistance. Even if you can’t afford the full set yet, consider investing in at least one or two pieces.
There’s also a cooking pot near the general store where you can prepare meals. This is your last chance to cook up some hearty dishes before heading into the more dangerous parts of the questline, so use it wisely. I always make sure to have a full inventory of cooked meals before starting any major quest.
Starting the “Tulin of Rito Village” Quest
Once you’ve explored the village and talked to the residents, it’s time to officially start Tulin’s questline. The quest is called “Tulin of Rito Village”, and it begins when you speak to Tulin himself. He’ll tell you about the mysterious blizzard that’s been plaguing the village and preventing the Rito from flying properly. This is a serious problem for a race of bird people who rely on flight for basically everything.
Understanding the Blizzard Crisis
The blizzard isn’t natural – it’s emanating from somewhere above the village, up in the sky. The Rito can’t fly high enough to investigate the source because the wind currents are too violent and unpredictable. This is where Link comes in. As the hero with the power to explore the Sky Islands and survive dangerous situations, you’re the perfect person to help solve this mystery.
Tulin explains that he’s already tried to investigate on his own, but he didn’t get very far. His father Teba is worried about him, which creates a nice character dynamic where Tulin is trying to prove he’s mature enough to help while Teba wants to protect his son. It’s a relatable family conflict that adds depth to the story.
Following Tulin to the Hebra South Summit Cave
After your initial conversation, Tulin will lead you to investigate the source of the blizzard. He’ll guide you to the Hebra South Summit Cave, which is located on the mountainside south of Rito Village. This cave is where Tulin believes the blizzard might be originating from, and he’s determined to check it out with or without your help.
The journey to the cave isn’t too difficult, but make sure your cold resistance is active. You’ll be climbing up snowy slopes and navigating icy terrain. Follow Tulin’s markers on your map, and he’ll lead you directly to the cave entrance. Along the way, you might encounter some weak ice enemies, but nothing too challenging if you came prepared.
Exploring the Cave and Finding Clues
Inside the Hebra South Summit Cave, you’ll discover that the cave system connects to passages that lead upward toward the sky. This is a cool environmental storytelling moment – the cave basically serves as a natural pathway between the ground level and the Sky Islands above. Tulin will be excited about this discovery, seeing it as confirmation that the source of the blizzard must be somewhere in the sky.
The cave has some basic puzzles involving breaking ice blocks and navigating around frozen obstacles. Use your weapons or fire-based abilities to melt the ice when necessary. There are also some resources scattered throughout the cave, including ore deposits and mushrooms, so take a moment to gather materials while you’re here.
As you progress deeper into the cave, you’ll eventually reach an exit that leads to the outside of the mountain, much higher up than where you entered. This brings you to a launching point where you can see the source of the blizzard – a Sky Island floating above, with the storm clearly emanating from it. Tulin will spot this too, and he’ll insist on going up there to investigate.

The Sky Islands: Following Tulin Upward
This is where things get really interesting. You’ll need to use your paraglider and the various updrafts and platforms to make your way up to the Sky Island that’s causing the blizzard. Tulin will fly alongside you, and you’ll need to follow him through the aerial obstacle course.
Navigating the Updrafts and Platforms
The path upward involves using natural updrafts created by the environmental conditions, as well as some zonai devices scattered on small floating platforms. You’ll be paragliding from platform to platform, using updrafts to gain altitude when available. This section serves as a great tutorial for the game’s aerial navigation mechanics, preparing you for the more complex flying sequences to come.
Make sure you have enough stamina to handle all this gliding. If your stamina wheel is small, you might need to land on platforms frequently to recover. This is one reason why I recommend completing several shrines before attempting this quest – those stamina vessel upgrades make aerial navigation much less stressful.
Tulin’s Special Ability Teased
During this climbing sequence, you’ll get your first glimpse of Tulin’s wind manipulation ability. He can create gusts of wind to help propel himself upward, something he learned from studying the ancient Rito warriors. This is actually a preview of the ability you’ll eventually gain access to once he becomes your Sage companion, and it’s a clever bit of foreshadowing.
Pay attention to how Tulin uses his wind ability during this sequence. He’ll create updrafts for himself and sometimes for you as well, showing you the practical applications of this power. It’s the game’s way of teaching you what to expect once you have full access to this ability later.
Dealing With Aerial Enemies
As you ascend, you’ll encounter Aerocudas – those octopus-like flying enemies that are common around Sky Islands. These creatures will attack you while you’re gliding, which can be dangerous if you’re not prepared. The best strategy is to use your bow and arrows to take them out before they can hit you. Aim carefully, because arrows are precious and you don’t want to waste them.
Some players like to ignore the Aerocudas and just focus on reaching the next platform, which is also a valid strategy if you’re confident in your dodging skills. However, I find it’s usually worth taking the time to clear enemies as you go, especially if they’re positioned along your intended path. A well-placed arrow can save you from taking damage and potentially falling.

Reaching the Wind Temple Ship
After successfully navigating the aerial ascent, you’ll arrive at a massive floating ship that’s surrounded by the blizzard. This is the Wind Temple, an ancient Zonai structure that has been corrupted and is now generating the unnatural storm plaguing Rito Village. The ship is impressive in scale, with multiple decks, mechanisms, and passages to explore.
The Wind Temple’s Unique Design
Unlike traditional Zelda dungeons, the Wind Temple is designed as a giant flying vessel. It has an open-air structure with multiple levels, propellers, and mechanical components that you’ll need to interact with to progress. The design is brilliant because it combines dungeon exploration with the game’s aerial mechanics, making you think vertically and use your paraglider constantly.
Tulin will accompany you through the temple, which is a nice change from exploring alone. He provides commentary on what you discover and actively helps during combat encounters. This cooperative element makes the Wind Temple feel more dynamic than dungeons where you’re just solving puzzles solo.
Understanding the Temple’s Objective
The goal inside the Wind Temple is to unlock five terminals scattered throughout the ship. Each terminal controls a different lock mechanism, and activating all five will grant you access to the boss chamber where you can confront the source of the corruption. The terminals are color-coded and marked on your map once you discover them, making navigation relatively straightforward.
What makes this dungeon interesting is that the terminals aren’t just lying around waiting for you to activate them. Each one requires solving environmental puzzles, often involving the temple’s mechanical components, moving platforms, and wind currents. You’ll need to use your Ultrahand, Fuse, and other abilities creatively to reach and activate each terminal.
Terminal Puzzles and Solutions
I won’t spoil every single puzzle solution because part of the fun is figuring them out yourself, but I’ll give you some general guidance for each terminal area. The puzzles involve manipulating the ship’s propellers, creating platforms with Ultrahand, and using Tulin’s wind ability to activate certain mechanisms.
First Terminal: The Bow Section
The first terminal is typically located near the bow (front) of the ship. You’ll need to navigate through some frozen passages and use fire-based attacks to melt ice blocking your path. There’s a gearwork mechanism that you can rotate using Ultrahand to create a path to the terminal. Once you figure out the correct orientation, the terminal becomes accessible.
Second Terminal: The Propeller Deck
This terminal requires you to restore power to one of the ship’s large propellers. You’ll need to use Ultrahand to connect gears and create a functional mechanism that can turn the propeller. Once the propeller is spinning, it creates an updraft that lets you glide up to a higher platform where the terminal is located. This puzzle teaches you about mechanical problem-solving in the game.
Third Terminal: The Stern Section
The third terminal is toward the back of the ship and involves some combat encounters with ice enemies. You’ll need to defeat the enemies to safely access the area, then solve a puzzle involving moving platforms and precise timing. Use Tulin’s wind ability to create gusts that can push certain objects or give you extra lift when gliding between platforms.
Fourth Terminal: The Lower Decks
This terminal is below the main deck, requiring you to drop down through openings in the ship’s floor. The puzzle here involves manipulating water wheels and ice formations. You’ll need to melt strategic ice blocks to allow water to flow properly, which then powers mechanisms that open the path to the terminal. It’s a nice change of pace from the pure aerial puzzles.
Fifth Terminal: The Crow’s Nest
The final terminal is at the very top of the ship’s mast, requiring significant vertical climbing. You’ll need to use a combination of climbing, gliding, and using updrafts to reach this height. Tulin’s wind ability becomes extremely useful here, as he can create gusts that propel you upward when natural updrafts aren’t available. The terminal itself is straightforward to activate once you reach it.
Using Tulin’s Ability in Combat and Puzzles
Throughout the Wind Temple, you’ll need to rely heavily on Tulin’s wind power. When you call on him (by pressing A when near him or using the ability menu), he’ll create a powerful gust of wind in the direction you’re facing. This has multiple applications: it can propel you upward while gliding, it can push objects and enemies, and it can activate wind-powered mechanisms.
The game does a great job of teaching you these applications organically through the dungeon design. You’ll encounter situations where the solution requires using Tulin’s wind in creative ways, and experimenting with his ability is both fun and rewarding. This hands-on experience prepares you perfectly for using the ability once it becomes permanently available after the dungeon.
Confronting Colgera: The Wind Temple Boss
Once you’ve activated all five terminals, the path to the boss chamber opens. You’ll face Colgera, a massive flying ice creature that’s the source of the corruption and the blizzard. This boss fight is absolutely spectacular and unlike anything you’ve experienced in the game so far. It’s a fully aerial combat encounter that takes place while you’re paragliding around the boss.
Phase One: Understanding the Fight Mechanics
Colgera has weak points in the form of ice crystals on its body. Your goal is to destroy these crystals while staying airborne. The boss flies in circles around the arena, and you need to glide alongside it, using updrafts and Tulin’s wind ability to maintain altitude. When you get close enough to a weak point, shoot it with arrows or attack it directly with your weapon if you can get close enough.
The fight brilliantly combines all the aerial skills you’ve been practicing throughout the questline. You need to manage your stamina, aim accurately while gliding, and use Tulin’s wind strategically to stay in the air. It’s challenging but fair, and incredibly satisfying when you successfully destroy a weak point.
Using Tulin Effectively Against Colgera
Tulin is essential in this fight. His wind ability can help you gain altitude quickly when you’re running low on updrafts, and he can also create gusts that push you toward the boss when you need to close the distance. Call on him frequently – don’t try to solo this encounter when you have such a powerful ally available.
Tulin will also attack Colgera independently, though his damage is minimal compared to yours. His real value is in the mobility and positioning options he provides. Mastering the rhythm of gliding, using updrafts, calling Tulin for wind boosts, and shooting arrows becomes the key to victory.
Phase Two: Increased Aggression
After you destroy enough weak points, Colgera enters a more aggressive phase. It starts creating ice projectiles that fall from above, creating hazards you need to dodge while maintaining your aerial position. The boss also becomes faster and its movement patterns more erratic, making it harder to line up shots on the remaining weak points.
Stay calm and focused during this phase. Continue using the same strategies that worked before, but be more aware of your surroundings. Those falling ice chunks can knock you out of the sky if you’re not careful, so keep moving and don’t stay in one position for too long. Tulin will help you recover if you need to regain altitude quickly after dodging.
Landing the Final Blow
Once you destroy all of Colgera’s weak points, it becomes stunned and crashes to the ground (or rather, the floating platform you’re fighting on). This is your opportunity to rush in and deal massive damage with your strongest weapons. Use charged attacks, flurry rushes if you can trigger them, and unleash everything you’ve got.
The boss will eventually recover and return to the air, repeating the cycle. You’ll need to destroy the weak points again, but they regenerate in fewer numbers, making each cycle slightly faster than the last. Keep this pattern going until Colgera is finally defeated. The sense of accomplishment when you land that final hit and the boss disintegrates is incredible.
Tulin’s Awakening as the Sage of Wind
After defeating Colgera, you’ll witness a beautiful cutscene where the corruption clears and the blizzard dissipates. More importantly, Tulin awakens as the Sage of Wind, connecting to the ancient power of the Rito sages who came before him. This is an emotional moment that ties into the game’s larger story about the Sages and their role in protecting Hyrule.
The Vow of the Sage
Tulin will make a vow to help you on your quest, officially becoming your companion. You’ll receive the Vow of Tulin, Sage of Wind, which allows you to summon his avatar at any time to use his wind ability. This is the moment you’ve been working toward – you now have permanent access to one of the game’s most useful abilities.
The cutscene also reveals more about the ancient Rito Sage who once held this position, connecting Tulin to a legacy that stretches back to the time of Rauru and the founding of Hyrule. It’s great storytelling that makes Tulin’s power feel meaningful and earned rather than just a gameplay mechanic you picked up.
Receiving the Heart Container
Like all major boss fights, defeating Colgera rewards you with a Heart Container, permanently increasing your maximum health. This is always appreciated, especially if you took some damage during the fight. The heart container appears after the cutscene, so make sure to grab it before leaving the area.
The Secret Stone
Tulin also receives a Secret Stone, one of the mystical gems that amplify a Sage’s power. While Tulin wears the stone as a physical character, you receive the ability to summon his avatar because of your connection as the bearer of Rauru’s arm. This explains the game mechanics in a lore-friendly way – you’re not literally carrying Tulin around, you’re calling upon the power granted by his Secret Stone.

Using Tulin’s Ability: Tips and Tricks
Now that you have Tulin as your permanent companion, let’s talk about how to use his ability effectively. The Gust ability is incredibly versatile, and mastering it will significantly improve your Tears of the Kingdom experience.
Basic Ability Mechanics
To activate Tulin’s ability, you press A when his avatar appears near you, or you can access him through the ability menu. Tulin will create a powerful gust of wind in the direction Link is facing. This gust can propel you upward while gliding, push objects and enemies, spin fans and windmills, and activate certain mechanisms.
The ability has a short cooldown after each use, so you can’t spam it indefinitely, but the cooldown is brief enough that you can use it frequently during exploration and combat. Learning to time your gust uses effectively is key to maximizing its utility.
Exploration Applications
For exploration, Tulin’s gust is game-changing. Whenever you need to gain altitude, just start gliding and call Tulin. His wind will shoot you upward, extending your glide distance dramatically. This makes reaching high places, crossing large gaps, and accessing Sky Islands much easier than relying solely on updrafts and climbing.
You can chain multiple gusts together if needed. Glide, call Tulin, glide a bit more, call him again when the cooldown refreshes. With this technique, you can reach almost any height in the game without needing to find specific updraft sources. It’s like having a portable fast-travel system for vertical movement.
Combat Applications
In combat, Tulin’s gust can knock back enemies, giving you breathing room when surrounded. It’s particularly effective against flying enemies like Aerocudas, as the wind can disrupt their flight and make them easier targets. You can also use the gust to push enemies off cliffs or into hazards, which is both effective and entertaining.
The wind can also be used defensively. If enemies are shooting projectiles at you, a well-timed gust can deflect them. This requires good timing and positioning, but it’s incredibly satisfying when you pull it off. Tulin essentially gives you a versatile tool that works in both offensive and defensive situations.
Puzzle-Solving Applications
Many shrines and puzzles throughout Hyrule involve wind-powered mechanisms, and Tulin’s ability lets you solve these much more easily. Windmills, fans, and certain Zonai devices all respond to his gusts. You no longer need to find specific items or build elaborate contraptions – just call Tulin and he’ll power the mechanism for you.
Some puzzles that seemed impossible before getting Tulin become trivially easy afterward. Backtracking to earlier areas with Tulin’s ability often reveals solutions you couldn’t access before, which adds a nice Metroidvania-style progression element to the game.

Returning to Rito Village
After completing the Wind Temple and gaining Tulin’s power, you’ll want to return to Rito Village to see how things have changed. The blizzard is gone, the weather is clear, and the Rito are overjoyed. Tulin is celebrated as a hero, though he humbly acknowledges that he couldn’t have done it without your help.
Village Reactions and Rewards
Talk to the various villagers to hear their reactions. Teba is incredibly proud of his son but also relieved that he’s safe. The village elder thanks you for solving the crisis and saving their home. Various other Rito will have new dialogue reflecting the changed circumstances, and some will offer small rewards like rupees or materials as thanks.
This is also a good time to complete any side quests you might have picked up in Rito Village. Some NPCs only give certain quests after you’ve completed the main storyline, so explore thoroughly and talk to everyone. You might discover new shops, mini-games, or activities that weren’t available before.
The Flight Range and Challenges
With the weather cleared, the Rito Flight Range becomes fully accessible. This is a mini-game area where you can practice aerial combat and target shooting while gliding. It’s optional content, but it’s genuinely fun and provides good rewards for hitting high scores. Plus, it’s great practice for improving your aerial combat skills, which will serve you well in the rest of the game.
The flight range also has some connection to Breath of the Wild nostalgia, as it was a memorable location in that game as well. If you’re a series veteran, revisiting this area with modern mechanics is a treat.

Why Tulin is Considered the Best Sage
Now that you have Tulin, you might be wondering if he lives up to the hype. After extensive playtime with all the Sages, I can confidently say that Tulin is the most universally useful companion in Tears of the Kingdom. Let me break down why so many players share this opinion.
Constant Utility vs. Situational Power
The other Sages have abilities that are powerful but situational. Yunobo’s charge attack is fantastic for breaking rocks and fighting certain enemies, but you don’t need it constantly. Sidon’s water shield is great for defense, but you only need defense when you’re in combat. Riju’s lightning deals massive damage but requires specific conditions to use effectively.
Tulin’s gust, on the other hand, is useful almost all the time. Every time you glide, every time you climb, every time you explore – Tulin makes it better. His ability isn’t just for specific situations; it’s a fundamental enhancement to your basic movement options. That’s what makes him stand out from the other Sages.
Synergy With Core Gameplay
Gliding is one of the core mechanics in Tears of the Kingdom. You glide constantly – when exploring, when navigating combat arenas, when moving between Sky Islands, when descending from heights. Tulin’s ability directly enhances this core mechanic, making the moment-to-moment gameplay feel smoother and more enjoyable.
This is smart game design. The developers gave you the most universally applicable Sage ability through what’s arguably the most accessible regional questline. Players who prioritize Rito Village get rewarded with an ability that makes the entire rest of the game more enjoyable, which encourages them to continue playing and exploring.
Quality of Life Impact
Beyond just being powerful, Tulin improves your quality of life while playing. He reduces the frustration of failed climbs, makes navigation faster, and opens up exploration routes that would otherwise require tedious workarounds. The game becomes less about fighting against limitations and more about freely exploring the world you want to discover.
Compare this to the other Sages. While they’re all helpful in their own ways, none of them fundamentally reduce friction in the gameplay experience like Tulin does. He’s not just a powerful ability – he’s a constant companion that makes every aspect of the game feel better.

What to Do After Getting Tulin
Congratulations! You’ve successfully recruited Tulin as your Sage companion. But the adventure is far from over. Let me share some recommendations for what to do next to make the most of your new abilities.
Explore the Hebra Region Thoroughly
Now that you have easy vertical mobility, the Hebra region becomes much more accessible. There are numerous Sky Islands, caves, and mountain peaks that are easier to reach with Tulin’s help. Return to areas you struggled with before and discover what you missed. The region is full of shrines, korok seeds, and valuable materials that reward thorough exploration.
The Hebra Mountains also have some challenging combat encounters and mini-bosses that provide excellent loot. With Tulin’s ability making navigation easier, you can tackle these challenges more efficiently and collect the weapons and materials you need for the adventures ahead.
Revisit Previous Areas
With Tulin’s gust ability, you can now solve puzzles and reach areas that were inaccessible before. Consider backtracking to shrines or locations where you remember seeing wind-based mechanisms. You’ll be surprised how many previously locked areas become accessible with this new ability.
This is particularly true for Sky Islands throughout Hyrule. Many have entrances or sections that require significant vertical mobility to reach. Tulin makes exploring these locations much more practical, and you’ll often find powerful weapons, rare materials, or additional shrines as rewards.
Continue With Other Regional Quests
While Tulin is fantastic, you’ll eventually want to recruit the other Sages to access their unique abilities and progress the main story. Each regional quest offers different challenges and rewards, and the combination of multiple Sage abilities creates even more strategic possibilities.
My personal recommendation for quest order after Rito Village is Gerudo Town (to get Riju), then Zora’s Domain (to get Sidon), and finally Goron City (to get Yunobo). But honestly, the game is designed to be flexible, so choose based on what interests you most or which region you want to explore next.
Work on Shrines and Korok Seeds
With easier navigation thanks to Tulin, now is a great time to focus on completing shrines to upgrade your health and stamina. The increased mobility makes finding and accessing shrines much less tedious. Similarly, many Korok seed puzzles become easier to solve when you can quickly gain altitude or reach high places.
Building up your stamina wheel is particularly valuable when you have Tulin, as it allows for even longer gliding sessions between gust uses. More stamina means more exploration range, which means discovering more of Hyrule’s secrets.

Final Thoughts: Tulin’s Role in Your Journey
Getting Tulin as your first Sage companion is one of the best decisions you can make in Tears of the Kingdom. His wind ability transforms how you navigate and explore Hyrule, making every subsequent quest and adventure more enjoyable. The Rito Village questline itself is a wonderfully crafted story about growing up, living up to legacy, and finding the courage to be a hero.
From the moment you arrive in Rito Village to the epic aerial battle against Colgera, every step of this journey is memorable. The developers at Nintendo created something special with this questline – it’s accessible enough for newer players while still providing satisfying challenges, and it rewards you with arguably the game’s most useful ability.
Whether you’re a longtime Zelda fan or new to the series, Tulin’s questline showcases what makes Tears of the Kingdom such an incredible game. It combines excellent dungeon design, memorable characters, stunning visuals, and meaningful gameplay rewards into one cohesive package. The Wind Temple might not be the longest or most complex dungeon in the game, but it’s definitely one of the most satisfying to complete.
As you continue your adventure through Hyrule with Tulin by your side, you’ll constantly find new ways to use his ability. Every mountain becomes easier to climb, every Sky Island more accessible, every exploration challenge more manageable. He’s not just a tool – he’s a genuine companion who makes your journey through this incredible world infinitely more enjoyable.
So if you’re standing in Lookout Landing right now wondering which regional quest to tackle first, head northwest to Rito Village. The young Rito warrior waiting there will become your most valuable ally, and the wind ability you’ll gain will change how you experience the entire game. Trust me, you won’t regret making Tulin your first Sage. Happy exploring, and may the wind be always at your back!
For more detailed guides on other Sage quests and Tears of the Kingdom content, check out the official Zelda Dungeon Wiki and IGN’s comprehensive guides. If you’re looking to master the other regional phenomena and recruit all the Sages, GameSpot’s Tears of the Kingdom walkthrough offers excellent tips for completing main quests. For those interested in optimizing their gameplay strategy, Polygon’s Tears of the Kingdom guides provide fantastic insights into shrine locations, armor upgrades, and advanced combat techniques. You can also find helpful community discussions and player experiences on the Tears of the Kingdom subreddit, where fans share their favorite strategies and discoveries. And remember, the adventure is what you make of it – there’s no wrong way to explore Hyrule!