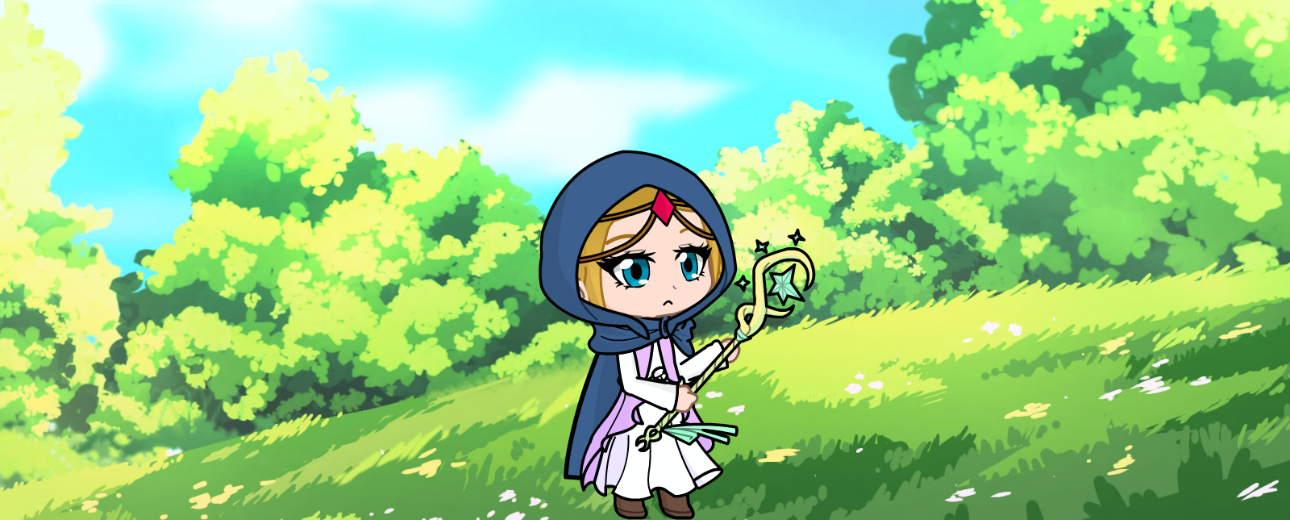
The Legend of Zelda: Echoes of Wisdom has revolutionized the franchise by putting Princess Zelda in the starring role for the first time, and with this historic shift comes an entirely new gameplay mechanic that defines the entire experience: the Tri Rod and its Echo system. Instead of relying on traditional swords and shields, Zelda wields the mysterious Tri Rod, a magical staff that allows her to create “echoes”—perfect replicas of objects, enemies, and environmental elements she’s encountered throughout her journey. This innovative mechanic transforms every encounter, puzzle, and exploration challenge into an opportunity for creative problem-solving, allowing players to approach situations in countless different ways depending on which echoes they’ve collected and how cleverly they can combine them.
What makes the Echo system so compelling is the sheer variety and versatility it offers. With over 120 different echoes to discover throughout Hyrule, ranging from simple objects like wooden boxes and pottery to complex enemy echoes like Moblins and Wizzrobes, the game encourages experimentation and rewards creative thinking in ways that feel genuinely fresh for the Zelda series. Each echo has its own properties, uses, and potential applications, and part of the joy of playing Echoes of Wisdom is discovering new echoes, testing them in different situations, and building your personal collection of favorite tools that match your playstyle. Some players might prefer combat-focused echoes that summon powerful allies to fight on their behalf, while others might gravitate toward utility echoes that solve puzzles or enable exploration.
The process of collecting echoes is deeply integrated into the game’s exploration and progression systems. You don’t simply unlock echoes by progressing through the story—you actively discover them by exploring every corner of Hyrule, defeating various enemies, examining interesting objects, and solving environmental puzzles. This creates a satisfying feedback loop where exploration is rewarded with new capabilities, and those new capabilities in turn enable even more exploration and discovery. Finding a new echo isn’t just about adding another number to your collection; it’s about gaining a new tool that might completely change how you approach challenges or open up entirely new strategies you hadn’t considered before.
For completionists and collectors, hunting down every single echo in Echoes of Wisdom represents one of the game’s most substantial and rewarding challenges. This comprehensive guide will walk you through every echo available in the game, organized by category for easy reference, with information about where to find each one, what makes it useful, and how to incorporate it into your strategies. Whether you’re just starting your adventure and want to know what echoes to prioritize, or you’re in the endgame hunting down those last few elusive echoes to complete your collection, this guide has everything you need to master the Tri Rod and unlock Zelda’s full potential.
Understanding the Echo System and Tri Rod Mechanics
Before diving into the complete echo catalog, it’s essential to understand how the Echo system works mechanically and what principles govern how you collect, manage, and use echoes throughout your adventure. The Tri Rod is more than just a tool—it’s the core of Zelda’s entire ability set in this game, and mastering its mechanics is key to success in both combat and puzzle-solving. Understanding the system’s rules, limitations, and possibilities will help you make better decisions about which echoes to collect and how to use them effectively.
How Echo Collection Works
The fundamental mechanic of echo collection is beautifully simple: whenever Zelda encounters an object or enemy that can be echoed, she can use the Tri Rod to “learn” that echo by examining it. For objects in the environment like rocks, trees, pots, and furniture, you simply approach them and use the Tri Rod’s scanning function to copy them into your echo library. The object doesn’t need to be in any particular state—you can echo a pot whether it’s intact or broken, a rock whether it’s sitting still or rolling down a hill, and most environmental elements regardless of their current condition. Once you’ve echoed an object once, it’s permanently added to your collection and can be summoned anywhere, anytime (within the system’s limitations).
Enemy echoes work slightly differently and add an extra layer of challenge to the collection process. To add an enemy echo to your collection, you first need to defeat that enemy type while the Tri Rod is active and ready to scan. After defeating the enemy, a brief window opens where you can scan the defeated foe and add it to your echo library. This means you can’t just run past enemies if you want to complete your collection—you need to engage with them, learn their attack patterns, and successfully defeat them before you can claim their echo. This creates interesting strategic decisions where you might need to backtrack to earlier areas to fight weaker enemies you skipped the first time through, or deliberately seek out rare enemy variants in specific locations.
Echo Energy and Summoning Limits
One of the most important mechanics to understand is the energy system that governs how many echoes you can have active at once. Each echo has an energy cost, displayed as a number when you select it, and Zelda has a maximum energy capacity that limits how many echoes she can maintain simultaneously. Simple echoes like wooden boxes or small rocks cost only one or two energy, while more complex echoes like large enemies or elaborate furniture can cost five, six, or even more energy points. This means you need to think strategically about which echoes to summon—you might be able to have five small echoes active at once, or just one large powerful echo, depending on the situation.
Your maximum energy capacity increases as you progress through the game, typically by completing dungeons, finding special items, or progressing through the main story. Early in the adventure, you’ll be quite limited in what you can summon, but by the endgame, you’ll have enough energy to maintain multiple complex echoes simultaneously, opening up much more elaborate strategies. Learning to manage your energy effectively is crucial—dismissing echoes you no longer need to free up energy for new summons, planning your echo usage before entering combat or puzzle rooms, and understanding which echoes give you the most value for their energy cost are all important skills to develop.
Echo Categories and Organization
The game organizes echoes into several broad categories to help you navigate your growing collection: Objects, Enemies, and Special echoes each have their own section in the echo menu. Objects include everything from furniture and building materials to natural elements like rocks and trees, while Enemies encompasses every creature type you can summon to fight alongside you. Special echoes are unique items or elements tied to specific story moments or locations, often with properties that don’t fit neatly into the other categories. Understanding these categories helps you quickly find the echo you need in the heat of the moment, especially once your collection grows to dozens of different options.
Within each category, echoes are further organized by various criteria—sometimes by the order you collected them, sometimes alphabetically, and sometimes by thematic grouping. The game provides sorting and filtering options that let you customize how your echo library is displayed, which becomes increasingly important as your collection expands. Some players prefer to sort by most recently acquired so they can quickly access new echoes they’re still experimenting with, while others prefer thematic organization that groups similar echoes together. Finding the organizational system that works best for your playstyle can significantly improve your efficiency in combat and puzzle-solving.
Strategic Considerations for Echo Usage
Not all echoes are created equal, and understanding which echoes excel in which situations is key to mastering the system. Combat echoes like enemy summons have different strengths, weaknesses, attack patterns, and durabilities, making some more suitable for certain enemy types or combat scenarios than others. A flying enemy echo might be perfect for aerial combat but useless against enemies with ranged attacks, while a heavily armored enemy echo might tank damage effectively but move too slowly to catch quick opponents. Learning these nuances through experimentation and observation is part of the fun of the system.
Similarly, object echoes have varying utility depending on the situation. A wooden box might seem simple, but it can be used as a stepping stool for climbing, a weight for pressure plates, a projectile to throw at enemies, or a barrier to block attacks. More specialized object echoes like trampolines, fans, or water blocks have specific uses that make them essential for certain puzzles but less versatile overall. Building a diverse collection ensures you always have the right tool for the job, while identifying a core set of versatile echoes that you rely on most frequently helps you operate efficiently without constantly scrolling through your entire library.
The Importance of Experimentation
Perhaps the most crucial aspect of mastering the Echo system is embracing experimentation and creative problem-solving. Echoes of Wisdom deliberately avoids having single “correct” solutions to most challenges, instead providing you with a toolkit and encouraging you to find approaches that work for your playstyle and available echoes. A puzzle that one player solves by stacking beds to reach a high platform might be solved by another player using trampoline echoes to bounce up, or by summoning flying enemy echoes to carry objects to unreachable locations. The game rewards creative thinking and celebrates the variety of approaches players discover.
This design philosophy extends to combat as well, where you might defeat a tough enemy by summoning powerful fighter echoes to battle directly, by using object echoes to create environmental hazards or defensive positions, or by combining multiple echo types in creative ways that exploit enemy weaknesses. The most satisfying moments in Echoes of Wisdom often come from discovering unusual echo combinations or applications that the developers may not have explicitly intended but that work perfectly within the system’s rules. This emergent gameplay creates stories and strategies unique to each player’s journey, making the Echo system feel genuinely innovative rather than just a gimmick.
Object Echoes: Building Blocks of Creativity
Object echoes form the foundation of your problem-solving toolkit in Echoes of Wisdom, providing the basic elements you’ll use for platforming, puzzle-solving, and creative environmental manipulation. These echoes range from simple household items to complex mechanical objects, and learning which objects to prioritize and how to use them effectively will make your adventure significantly smoother. Let’s explore the major categories of object echoes and highlight the most useful and interesting examples in each category.
Basic Building and Platforming Echoes
The most fundamental object echoes are those used for creating platforms, bridges, and structures that help you navigate the environment and reach otherwise inaccessible areas. Wooden boxes and crates are among the first echoes most players collect, and they remain useful throughout the entire game despite their simplicity. These basic blocks can be stacked to create staircases, arranged to form bridges across gaps, used as weights on pressure plates, or thrown as improvised projectiles. Their low energy cost means you can summon multiple boxes simultaneously, and their versatility makes them valuable in countless situations.
Beds and tables represent slightly more advanced platforming echoes, offering larger surfaces that can span wider gaps or provide more stable platforms than simple boxes. The bed echo in particular becomes a favorite among many players because it provides a long, flat surface perfect for creating bridges, and it can be placed at various angles to reach diagonal or elevated positions. Tables work similarly but with different dimensions, giving you options for different spatial configurations. These furniture echoes cost slightly more energy than basic boxes but provide significantly more utility in exchange, making them excellent value for their cost.
Trampolines and springs introduce vertical mobility to your echo toolkit, allowing you to reach high ledges and platforms that would be impossible to access through climbing or stacking alone. The trampoline echo is particularly powerful because it not only launches Zelda upward with significant force but can also be used to launch objects, enemies, or even echoed enemies into the air. This creates all sorts of creative possibilities—you might use trampolines to reach secret areas, to launch bombs at distant targets, or to disrupt enemy formations by bouncing foes into hazards. The spring echo functions similarly but with a more focused, directional bounce, making it useful for precise platforming challenges where the trampoline’s broader bounce area might be less controlled.
Water and Liquid Echoes
Water-based echoes introduce unique physics and environmental interactions that open up entirely new categories of puzzles and challenges. The water block echo allows you to create small volumes of water that can fill containers, activate water wheels, create temporary swimming spaces, or extinguish fires. This echo is essential for numerous puzzles throughout the game, particularly in dungeons and shrines where water-based mechanics play a central role. The ability to create water anywhere transforms how you approach environmental challenges, letting you bring solutions with you rather than searching for existing water sources.
Ice blocks represent a variation on water echoes with different properties and applications. Unlike water blocks that flow and spread, ice blocks create solid, slippery surfaces that can be used for platforming, for creating slides that objects or characters can slide down, or for freezing bodies of water to create temporary walkways. The slippery nature of ice creates interesting physics interactions—objects placed on ice blocks will slide in the direction of any slope, and enemies walking on ice lose traction and move unpredictably. Some puzzles specifically require ice echoes to solve, while others can be solved with ice as one option among several alternatives.
Lava echoes exist in certain volcanic or underground areas and provide similar utility to water echoes but with a dangerous twist. While you generally can’t create lava blocks yourself for safety reasons, you can sometimes echo lava-related objects like lava-proof platforms or heat-resistant containers that interact with existing lava in the environment. These specialized echoes are typically only useful in specific regions but become essential when you’re exploring volcanic areas or fire-themed dungeons where heat and lava present constant hazards.
Mechanical and Interactive Object Echoes
Beyond static objects, the game includes numerous echoes of mechanical devices and interactive elements that add complexity and capability to your toolkit. Fans and wind generators create directional air currents that can push objects, activate wind-based mechanisms, or even provide lift for gliding. The fan echo is incredibly versatile—you can use it to blow away fog or harmful gases, to push objects across gaps, to activate windmills or other wind-powered devices, or to enhance your gliding distance by positioning fans to create updrafts. Learning to position and angle fans effectively unlocks solutions to many puzzles and can even be useful in combat by pushing lightweight enemies into hazards.
Bomb echoes deserve special mention as one of the most universally useful object echoes in the game. Bombs can destroy cracked walls and obstacles, defeat enemies, activate explosive-sensitive mechanisms, and generally serve as your primary tool for environmental destruction. The bomb echo comes in several variants with different blast radii, fuse timers, and properties, giving you options for different situations. Remote bombs that you can detonate on command offer more control than timed bombs, while rolling bombs can be sent down slopes or through narrow passages. Mastering bomb usage and timing is essential for progression, as many secrets and pathways are hidden behind destructible barriers that only bombs can clear.
Torch and fire-related echoes provide solutions for puzzles and challenges involving ignition, light, or heat. The torch echo creates a portable light source that illuminates dark areas, but more importantly, it can transfer fire to other objects, activate fire-based mechanisms, or melt ice obstacles. Some puzzles require you to create chains of fire, lighting one torch from another to reach a distant target, while others need you to maintain a flame through areas with wind or water that would normally extinguish it. Fire echoes also have combat applications, as many enemies are vulnerable to fire damage or can be controlled through strategic placement of flames that create barriers or dangerous zones.
Specialized Puzzle Object Echoes
Certain object echoes exist primarily to solve specific types of puzzles and may have limited applications outside their intended use cases. Mirrors and reflective surfaces can redirect light beams, which is essential for solving light-based puzzles found in certain dungeons and shrines. These puzzles typically involve positioning mirrors at specific angles to bounce light from a source to a target, activating mechanisms or revealing hidden pathways. While mirror echoes have limited utility outside these specific puzzles, they become absolutely essential when you encounter light-based challenges, and understanding how to angle and position them correctly is a skill worth developing.
Weight and pressure plate echoes include various heavy objects designed specifically to activate weight-sensitive mechanisms. While you can technically use any heavy object echo for this purpose, specialized weight echoes are calibrated to specific thresholds, ensuring they’ll activate the mechanisms they’re designed for. Some puzzles require precise weight amounts—too little and the mechanism won’t activate, too much and it might break or malfunction—making these specialized echoes important tools for completionists. That said, many players find creative solutions using combinations of lighter echoes to achieve the required weight, demonstrating the system’s flexibility.
Containers and vessels represent another specialized category, allowing you to carry liquids, capture small creatures, or transport objects that need to be kept separate from the environment. A pot echo might seem simple, but it can be used to carry water from one location to another, to trap small enemies or critters, or to create protective barriers around fragile objects. Bottle and jar echoes function similarly but with different capacities and properties, giving you options for different transport challenges. Some puzzles specifically require you to move liquids across areas where water blocks would dissipate or ice blocks would melt, making container echoes the only viable solution.
Decorative and Environmental Object Echoes
Not every object echo has an obvious mechanical purpose, but that doesn’t mean they’re useless. Decorative items like paintings, statues, plants, and furniture often serve as atmospheric elements that make the world feel lived-in and detailed, but creative players find uses for even the most ornamental echoes. A statue echo might be used as an improvised weight, a conversation piece that distracts NPCs, or a marker to help you remember important locations. Plant echoes can provide cover in stealth situations, create visual barriers that block enemy line of sight, or simply make your temporary campsites more pleasant and homey.
Environmental echoes like rocks, trees, grass patches, and terrain elements allow you to recreate natural landscapes or solve puzzles that require specific environmental conditions. A tree echo might be used to create a climbable structure, to block a pathway, or to provide shade in areas where direct sunlight is hazardous. Rock echoes come in various sizes and shapes, each with different physics properties—some rocks are perfectly round and will roll down slopes, while others are irregular and remain stationary when placed. Understanding these subtle differences helps you choose the right rock echo for situations that require weight, barriers, or ammunition for throwing or rolling attacks.
The game occasionally rewards players who collect seemingly useless decorative echoes by incorporating them into side quests, NPC requests, or hidden challenges. An NPC might ask you to recreate a specific room layout, requiring you to have echoed all the furniture and decorations from that room, or a puzzle might require you to match a pattern using decorative elements. These moments celebrate players who take the time to echo everything they encounter rather than just collecting the obviously useful items, adding depth to the collection aspect of the game and encouraging thorough exploration.
Enemy Echoes: Your Summoned Army
Enemy echoes transform combat in Echoes of Wisdom from a traditional Zelda action experience into something more strategic and tactical, where you command summoned allies rather than fighting directly. Each enemy type you can echo brings different abilities, behaviors, and stats to your summoned army, and building a diverse collection of enemy echoes gives you options for handling any combat situation. Understanding which enemies excel in which roles and how to combine different enemy echoes for maximum effectiveness is key to mastering combat in Echoes of Wisdom.
Basic Enemy Echoes and Early Game Summons
The first enemy echoes most players collect come from the basic hostile creatures found in Hyrule’s fields, forests, and starting areas. Chuchu echoes are typically among the earliest enemy summons you’ll acquire, and while they’re not particularly powerful, they’re cheap to summon and useful for distracting enemies or dealing with very weak opponents. Chuchus come in several elemental variants—regular, fire, ice, and electric—and each type deals its associated elemental damage. This makes even these basic summons useful throughout the game, as you can choose the elemental variant that exploits a particular enemy’s weakness.
Keese echoes represent your first flying summons, and they remain useful even as you acquire more powerful options because of their mobility and low energy cost. Keese can attack enemies that ground-based summons can’t reach, can scout ahead to trigger traps or reveal ambushes, and can distract flying enemies while your other summons attack grounded foes. Like Chuchus, Keese come in elemental variants that add fire, ice, or electric damage to their attacks. The bat-like erratic flight pattern of Keese can actually be advantageous in some situations, as their unpredictable movement makes them harder for enemies to hit with ranged attacks.
Octorok echoes provide your first experience with enemies that have ranged attack capabilities. These octopus-like creatures shoot rocks at distant targets, making them useful for attacking enemies behind barriers, across gaps, or on elevated platforms that your melee summons can’t reach. Octoroks are relatively fragile and don’t deal massive damage, but their ability to engage from a distance while keeping themselves relatively safe makes them valuable support summons throughout the game. They’re particularly useful in situations where you need to trigger distant switches, break pots or obstacles from afar, or keep pressure on enemies without risking your more valuable summons in direct combat.
Mid-Tier Combat Echoes
As you explore deeper into Hyrule and tackle more challenging regions and dungeons, you’ll encounter stronger enemies that make for much more formidable summons. Moblin echoes represent a significant power spike, offering heavy melee damage and durability that can hold the line against multiple weaker enemies or serve as tanks in tougher fights. Moblins come in several color variants with increasing stats—red Moblins are the basic version, blue Moblins are stronger, and black Moblins are elite warriors with high health and damage. A well-placed Moblin echo can turn the tide of difficult battles, drawing enemy attention and dishing out punishment while you support from behind or deal with other threats.
Lizalfos echoes bring speed and agility to your summon roster, excelling at hit-and-run tactics and overwhelming isolated enemies with quick combo attacks. Unlike the slow, heavy Moblins, Lizalfos are mobile fighters that dodge and weave through combat, making them excellent for fighting enemies with slow, powerful attacks that can be avoided through movement. Lizalfos also come in elemental variants that add fire, ice, or electric properties to their attacks, creating additional tactical options. A fire Lizalfos can melt ice obstacles and deal bonus damage to ice-weak enemies, while an electric Lizalfos can disrupt enemy attacks and create chain lightning effects against groups.
Wizzrobe echoes introduce powerful magical attacks to your arsenal, functioning as artillery units that hang back and blast enemies with elemental magic. Fire Wizzrobes shoot fireballs that can ignite flammable objects and deal heavy damage to ice-vulnerable foes, Ice Wizzrobes freeze enemies in place and create slippery ice patches, and Electric Wizzrobes stun targets and can disable mechanical enemies. Wizzrobes are fragile compared to melee summons and will quickly fall if enemies close the distance, but their devastating magical attacks make them worth protecting. Positioning Wizzrobes behind your tanky Moblin summons creates a classic front-line/back-line formation that’s effective against many enemy compositions.
Elite and Boss Enemy Echoes
Some of the most powerful echoes in the game come from mini-bosses, elite enemies, and other special encounters that require significant effort to defeat and echo. Hinox echoes summon the massive cyclops creatures that serve as mini-bosses in several locations, and these giants are incredibly powerful allies that can devastate normal enemies and even hold their own against other mini-bosses. The Hinox’s massive health pool and sweeping attacks make it one of the best summons for situations where you need overwhelming force, though its high energy cost means you usually can’t summon much else while a Hinox is active. Deciding when the situation warrants the investment of your entire energy pool into a single powerful summon versus splitting your energy across multiple weaker summons is an important strategic choice.
Lynel echoes represent some of the ultimate combat summons, as Lynels are among the toughest regular enemies in any Zelda game. To even acquire a Lynel echo, you need to successfully defeat a Lynel, which is a significant challenge requiring mastery of combat mechanics, perfect dodging, and effective use of your existing echoes. Once you have a Lynel echo, though, it’s an absolute powerhouse capable of soloing most standard combat encounters. Lynels combine the durability of Moblins with the speed of Lizalfos and add powerful ranged attacks and charging moves, making them versatile threats that can handle almost any situation. The energy cost is substantial, but when you need to bring overwhelming force to a fight, a Lynel echo delivers.
Talus echoes are unique because they summon the massive rock creatures that can reshape the battlefield with their size and attacks. A Talus echo essentially creates a moving piece of terrain, blocking pathways, crushing enemies beneath its bulk, and forcing opponents to maneuver around it. Taluses are slow and can be vulnerable to enemies that can exploit their weak points, but their massive health and area denial make them excellent for controlling space in large battle arenas. Some players use Talus echoes defensively, positioning them to block enemy reinforcements or protect vulnerable areas, while others use them offensively to literally steamroll enemy positions.
Specialized and Utility Enemy Echoes
Not all enemy echoes are primarily designed for combat—some have special abilities or behaviors that make them valuable for puzzle-solving, exploration, or utility purposes. Rope echoes, for example, can latch onto certain surfaces and create pathways or help you reach elevated positions, functioning more as exploration tools than combat summons. These specialized echoes often cost less energy than pure combat summons and can be maintained alongside fighting echoes, allowing you to keep utility options available while still having combat capability ready.
Peahat and other flying platform enemies can be echoed and used as aerial transportation, carrying Zelda or objects through the air to reach otherwise inaccessible locations. This transforms certain flying enemies from threats into invaluable exploration tools, and creative players find all sorts of uses for flying echoes beyond their intended combat roles. A flying enemy echo might be used to scout dangerous areas from above, to bypass ground-based hazards or enemy patrols, or to create dynamic platforms that move through three-dimensional space in ways that static object echoes can’t replicate.
Certain enemy echoes have destructive capabilities that make them useful for clearing obstacles or accessing hidden areas. Bombchu echoes, for instance, function similarly to bomb echoes but with mobility, rolling toward targets and exploding on contact. This makes them useful for triggering distant explosive barrels, destroying obstacles in hard-to-reach locations, or attacking enemies that are protected by barriers. Other enemy echoes might have abilities like digging, pushing heavy objects, or activating specific types of mechanisms, making them essential tools for completionists who want to access every secret and solve every puzzle.
Enemy Echo Synergies and Team Composition
One of the most satisfying aspects of the enemy echo system is discovering combinations and synergies between different summons that create emergent tactical options. Pairing a tanky Moblin echo with a fragile but powerful Wizzrobe creates a classic tank-and-DPS combination where the Moblin draws enemy attention while the Wizzrobe deals massive damage from safety. Similarly, combining multiple elemental enemy echoes can exploit environmental interactions—a fire-based summon can melt ice created by your ice summons, creating water that electric summons can electrify, damaging all enemies standing in it. These elemental chain reactions aren’t explicitly tutorialized, making them feel like discoveries when players figure them out.
Speed and crowd control combinations offer another powerful synergy. Fast enemies like Lizalfos can keep opponents off-balance and occupied while slower, heavier hitters like Hinoxes move into position to deal devastating attacks.Flying echoes can harass ranged enemies and interrupt their attacks while ground-based summons push forward, dividing enemy attention across multiple threats and preventing them from focusing fire effectively. Learning to recognize which echo combinations complement each other and deploying them strategically transforms combat from random summoning into tactical squad management.
The energy cost system naturally creates decisions about army composition. Do you summon one extremely powerful echo that costs most of your energy, betting everything on that single strong unit? Do you summon several mid-tier echoes to create a balanced force with redundancy? Or do you summon many weak echoes to overwhelm enemies through numbers? Each approach has situations where it excels, and learning to read combat encounters and choose appropriate compositions is a skill that develops over time. Some bosses are best handled with a single powerful summon that can match them in direct combat, while swarms of weak enemies might be efficiently dealt with by summoning many cheap echoes that can engage multiple targets simultaneously.
Special and Rare Echoes: Unique Finds
Beyond the standard object and enemy echoes, Echoes of Wisdom includes numerous special echoes that don’t fit neatly into other categories or that have unique properties and acquisition methods. These rare and special echoes often represent some of the most interesting and powerful tools in your collection, and hunting them down provides additional goals for completionists and explorers. Let’s explore the various types of special echoes and highlight some of the most notable examples.
Story-Related Special Echoes
Certain echoes are tied directly to story progression and can only be obtained by completing specific main quests or dungeon challenges. These echoes often have narrative significance, representing important artifacts, legendary items, or unique elements tied to the game’s lore and plot. Because they’re story-gated, you don’t need to worry about missing them permanently—as long as you progress through the main quest, you’ll encounter opportunities to collect these special echoes. However, it’s worth paying attention when the game presents these opportunities, as some story echoes have particularly useful properties that can help with subsequent challenges.
One category of story echoes includes replicas of legendary items from Zelda history. While Zelda typically can’t wield these items directly in the same way Link would, echoing them allows her to summon temporary copies that she or her summons can interact with. These legendary echo versions might have modified properties or limitations compared to their traditional forms, but they still carry the essence of their original versions and often prove extremely useful in situations where their specific properties are needed. Collecting these echoes feels like a celebration of Zelda history, connecting Echoes of Wisdom to the broader franchise legacy.
Boss-specific echoes represent another story-related category, obtained only by defeating major bosses throughout the adventure. These echoes often capture unique mechanics or abilities from the boss fights themselves, allowing you to replicate those powers in subsequent encounters. A boss echo might give you access to a specific type of projectile, a unique movement ability, or a special interaction with the environment that no other echo provides. These echoes tend to be powerful but situational, excelling in scenarios similar to the boss fights where you acquired them but potentially less useful in general-purpose situations.
Hidden and Secret Echoes
Some of the most satisfying echoes to collect are those hidden in secret locations, behind challenging puzzles, or as rewards for completing difficult optional content. These hidden echoes require exploration, observation, and often lateral thinking to discover, and finding them feels genuinely rewarding because they’re missable if you don’t actively search for them. The game occasionally provides hints about hidden echo locations through NPC dialogue, environmental clues, or suspicious-looking areas that practically beg to be investigated, but many secret echoes require you to thoroughly explore areas and experiment with your existing echoes to access hidden spaces.
Cave and underground network exploration often yields rare echoes not found anywhere else. Hyrule is riddled with hidden caves, passages behind waterfalls, tunnels beneath mountains, and other concealed locations that contain unique echoes as rewards for thorough exploration. Some of these secret areas require specific echoes to access—you might need to melt ice blocking a cave entrance, blow up a cracked wall with bombs, or create a water source to activate a mechanism that reveals a hidden passage. This creates a satisfying progression where finding one echo enables you to access areas containing additional rare echoes, steadily expanding your capabilities and opening up more of the world.
Side quest rewards represent another significant source of unique echoes. Many NPCs throughout Hyrule offer side quests that, when completed, reward you with special echoes you can’t obtain through normal gameplay. These quest echoes range from practical items that fill gaps in your collection to novelty echoes that might not have obvious applications but that creative players find uses for. Completionists will want to talk to every NPC and exhaust all dialogue options to ensure they don’t miss any side quests that might offer unique echo rewards. Some side quests have multiple parts or require you to return to the quest giver at different points in the story, so maintaining a mental or written log of ongoing quests helps ensure you don’t miss rewards.
Regional and Biome-Specific Echoes
Different regions and biomes throughout Hyrule contain echoes that are unique to those areas, reflecting the local environment, ecology, and culture. Volcanic regions might contain special heat-resistant echoes, fire-based objects, or magma-related elements that can’t be found elsewhere, while icy mountain areas offer frozen variants of standard echoes with different properties. Collecting these regional echoes often requires you to fully explore each biome, venturing into the most dangerous and remote corners to find every unique element. This encourages thorough regional exploration rather than simply rushing through areas to complete story objectives.
Underwater echoes represent a special category found only in areas where Zelda can swim or dive. These echoes might include aquatic objects, water-adapted enemies, or submarine features that function differently than their land-based counterparts. Collecting underwater echoes requires you to engage with the swimming mechanics, explore beneath the surface of lakes and seas, and potentially solve underwater puzzles or defeat aquatic enemies. Some players find underwater sections challenging due to the different movement physics and reduced visibility, making the rare echoes found in these areas feel like especially hard-won rewards.
Cultural and settlement-specific echoes reflect the unique aspects of different Hyrulean civilizations. Goron City might offer echoes of Goron-specific tools, furniture, and cultural items, while Zora’s Domain provides echoes tied to Zora architecture and lifestyle. Collecting these cultural echoes isn’t strictly necessary for gameplay progression, but it enriches your understanding of Hyrule’s peoples and allows you to recreate elements of different cultures in your own echo constructions. Some players enjoy creating little dioramas or scenes using culturally-specific echoes, essentially using the echo system as a creative building tool in addition to its practical applications.
Limited and Missable Echoes
While Echoes of Wisdom is generally forgiving about echo collection and allows you to return to most areas to collect echoes you missed, there are a small number of potentially missable echoes that players should be aware of. Certain enemy variants might only appear during specific story events or under particular conditions, and if you don’t echo them during their limited appearance window, you might need to wait for those conditions to recur or progress to new game plus to get another chance. Being aware of these limited opportunities and taking the time to echo everything you encounter during special events helps avoid frustrating situations where you’re hunting for that one missing echo and can’t find it anywhere.
Time-limited events or weather conditions sometimes spawn unique echoes that don’t appear during normal circumstances. A special enemy type might only appear during thunderstorms, or a particular object might only be present during specific in-game times of day. Players working toward 100% echo completion need to experience the full range of Hyrule’s environmental conditions and actively seek out encounters during unusual weather or time periods. The game’s day-night cycle and weather systems exist partly to create this variety, and engaging with these systems rather than always fast-traveling or sleeping through inconvenient conditions ensures you don’t miss temporary echo opportunities.
Event-exclusive echoes tied to festivals, celebrations, or special story moments represent the rarest category of potentially missable content. If an echo is only available during a specific festival or story event and that event can’t be repeated, you need to make sure you collect the echo before the event concludes. Fortunately, the game usually provides clear indicators when special events are occurring, and NPCs often draw attention to unique items or enemies present during these occasions. Paying attention to dialogue and taking the time to thoroughly explore during special events ensures you capture these exclusive echoes for your collection.
Strategic Echo Usage: Combat and Puzzles
Having a complete echo collection is only valuable if you understand how to use these tools effectively in the situations where they shine. The most skilled Echoes of Wisdom players aren’t necessarily those who’ve collected every echo, but those who understand the strategic applications of their echoes and can quickly deploy the right tools for any situation. Let’s explore advanced strategies for using echoes in combat and puzzle-solving scenarios.
Combat Strategies and Enemy Echo Tactics
Effective combat in Echoes of Wisdom requires understanding not just individual echo capabilities but also how to deploy them strategically based on the enemies you’re facing and the environment you’re fighting in. Against swarms of weak enemies, summoning multiple cheap combat echoes creates a numbers advantage that can overwhelm opponents through sheer volume of attacks. Five or six Keese echoes might not seem impressive individually, but together they create a chaotic battlefield where enemies struggle to focus on any single target, allowing Zelda to stay safe while her summons handle the fighting. This quantity-over-quality approach works particularly well in confined spaces where enemies can’t easily maneuver to avoid your summons.
Fighting powerful single enemies or bosses requires different tactics, often favoring quality over quantity. Against a tough mini-boss, summoning your most powerful combat echo—perhaps a Lynel or Hinox—creates a more or less fair fight between matched opponents, and you can support your champion summon with object echoes that create advantages or block enemy attacks. Positioning becomes crucial in these fights: placing your summon to intercept the boss while you stay at range, using object echoes to create barriers that protect you from area attacks, or summoning utility echoes that can heal or buff your primary fighter. These boss fights become strategic puzzles where success comes from clever echo deployment as much as from raw power.
Environmental awareness transforms combat effectiveness dramatically. Fighting near lava allows you to use object echoes to push or maneuver enemies into the hazard, instantly defeating them regardless of their health or defenses. Similarly, fighting on elevated platforms or near cliffs creates opportunities to knock enemies off edges for instant KOs. Water creates opportunities for electric echoes to shock multiple enemies simultaneously, while grassy areas can be set ablaze by fire echoes to create persistent damage zones. Learning to recognize environmental features that can be exploited through echo usage and positioning fights to take advantage of these features demonstrates mastery of the combat system beyond simple summon-and-hope tactics.
Puzzle-Solving Techniques and Creative Echo Applications
Echoes of Wisdom’s puzzles are designed to have multiple solutions, and understanding the breadth of your echo toolkit allows you to find approaches that match your preferences and available resources. Weight-based puzzles that require you to activate pressure plates can be solved with dedicated weight echoes, but they can also be solved by stacking multiple lighter echoes, by summoning heavy enemy echoes to stand on the plates, or sometimes by using Zelda’s own weight combined with a single echo. This flexibility means that even if you haven’t collected the “intended” solution echo, you can likely jury-rig an alternative that accomplishes the same goal.
Vertical movement puzzles demonstrate the creative potential of echo combinations particularly well. A high ledge might be reached by stacking bed echoes to create a staircase, by using trampoline echoes to bounce upward, by summoning flying enemy echoes that can carry objects or provide platforms, or by creating elaborate combinations of multiple echo types that work together to provide the needed height. Some players pride themselves on finding the most efficient solutions using the fewest echoes, while others enjoy creating complex Rube Goldberg-style constructions that solve puzzles through elaborate chains of cause and effect. The game rewards both approaches, making puzzle-solving feel personal and expressive rather than rigidly prescriptive.
Time-based and momentum puzzles require understanding physics and how echoes interact with motion. Rolling boulder echoes down slopes to hit distant targets, timing the placement of platforms so that moving objects land on them correctly, or using fan echoes to accelerate objects through precise timing all require you to think about the dynamic properties of echoes rather than just their static capabilities. These puzzles feel satisfying to solve because they demand genuine understanding of the game’s physics systems and reward experimentation and iteration. When you finally nail the timing and watch your carefully orchestrated echo sequence execute perfectly to solve a complex puzzle, it creates a sense of accomplishment that purely combat-focused games rarely achieve.
Resource Management and Energy Optimization
Managing your echo energy efficiently separates competent players from masters of the system. Understanding the energy cost-to-benefit ratio of different echoes allows you to make smart deployment decisions that maximize your effectiveness within your energy budget. Sometimes the most expensive echo isn’t the best choice for a situation—a puzzle that can be solved with three one-energy boxes is more efficient than using a single five-energy elaborate structure echo, leaving you energy to summon combat echoes if enemies appear. This kind of optimization thinking becomes second nature with experience, allowing you to solve challenges efficiently while maintaining combat readiness.
Echo recycling—dismissing echoes you no longer need to free up energy for new summons—is a crucial skill that many players overlook initially. The game allows you to dismiss active echoes at any time, immediately refunding their energy cost, and skillful players constantly manage their active echo roster based on current needs. After using boxes to climb to a high ledge, dismissing those boxes frees energy for combat echoes when enemies appear. After defeating enemies with summons, dismissing combat echoes allows you to spawn utility echoes for puzzle-solving. This active management creates a dynamic playstyle where you’re constantly adapting your echo loadout to match the evolving situation.
Planning ahead and pre-positioning echoes before encounters begins demonstrates advanced strategic thinking. If you know a challenging combat arena is ahead, setting up advantageous positions before triggering the fight—placing defensive barriers, creating high ground for ranged echoes, or positioning object echoes that can be weaponized during combat—gives you significant advantages when fighting begins. Similarly, pre-solving parts of puzzles by placing echoes in strategic positions before activating mechanisms can simplify complex multi-step challenges. This preparatory playstyle rewards observation, patience, and strategic thinking over pure reaction speed.
Advanced Techniques and Echo Combos
Truly mastering the echo system requires discovering and practicing advanced techniques that the game doesn’t explicitly teach but that emerge naturally from the mechanics. Echo launching—placing a trampoline echo and then summoning a heavy object echo above it to launch the object at high speed—creates improvised projectiles that can deal massive damage or trigger distant mechanisms. This technique isn’t necessary for completing the game, but discovering it and learning to execute it consistently feels like uncovering a secret technique, and it opens up creative approaches to challenges that the developers may not have specifically anticipated.
Chaining echoes—using one echo to enable the placement of another echo in a position that wouldn’t otherwise be accessible—allows you to reach seemingly impossible locations or create structures that defy normal construction logic. You might place a bed echo at an angle, then place a box on the angled bed, then place another bed on the box at a different angle, creating a spiraling staircase that reaches extreme heights. These elaborate constructions take practice to execute reliably and require spatial reasoning to visualize before building, but they demonstrate the incredible flexibility and emergent potential of the echo system when pushed to its limits.
Elemental chaining—combining different elemental echoes to create reaction sequences—adds another layer of strategic depth for players who take the time to understand elemental interactions. Placing ice echoes in water to create frozen platforms, then using fire echoes to melt specific ice sections and redirect water flow, then using electric echoes to electrify the redirected water and damage enemies in a specific zone represents the kind of complex, multi-step elemental manipulation that the system enables. These techniques rarely come up as explicit puzzle requirements, but discovering them through experimentation and finding situations where they provide advantages makes you feel like you’re truly mastering the game’s systems rather than just following prescribed solutions.
Collecting Every Echo: Completion Checklist and Tips
For players determined to collect every single echo in Echoes of Wisdom, the journey requires systematic exploration, careful attention to detail, and sometimes specific strategies to encounter rare enemy variants or access hidden areas. Achieving 100% echo completion represents one of the game’s most significant accomplishments and demonstrates thorough mastery of Hyrule’s every corner. Here’s a comprehensive approach to ensuring you don’t miss any echoes on your path to completion.
Systematic Regional Exploration
The most reliable method for complete echo collection is to explore each region of Hyrule thoroughly and systematically, echoing every object and defeating every enemy type you encounter. Rather than rushing through areas focused only on story objectives, take time to examine your surroundings, look for interesting objects to echo, and engage with enemy variety. When entering a new region for the first time, make a mental note of enemy types you encounter and deliberately seek them out for combat and echoing. If you see an interesting object or environmental feature you haven’t echoed before, take a moment to add it to your collection even if it doesn’t seem immediately useful.
Creating a completion checklist—either mental or written—helps track which regions you’ve fully explored and which might still contain undiscovered echoes. The game’s map includes markers that indicate how thoroughly you’ve explored each area, and a fully explored area is more likely to have yielded all its unique echoes. If a region shows low completion percentage or areas without map markers, that suggests you haven’t fully explored it and might be missing echoes. Returning to these underexplored regions with the specific goal of echo hunting rather than story progression often reveals objects and enemies you overlooked during your first pass through the area.
Night and day cycles affect which enemies appear in certain locations, so experiencing each region during both daytime and nighttime is important for complete enemy echo collection. Some enemy types are nocturnal and only appear after dark, while others might only appear during specific weather conditions. Don’t always sleep through the night or fast-travel past inconvenient times of day—instead, actively explore during different conditions to encounter the full range of enemy variants and ensure you’re not missing time-specific echoes.
Enemy Echo Hunting Strategies
Certain enemy echoes come from rare variants that don’t appear in every encounter of that enemy type, requiring you to either search specific locations where these variants spawn or wait for particular conditions. Elemental variants of standard enemies—fire Chuchus, ice Keese, electric Lizalfos—often appear in regions thematically associated with those elements but might be rare or absent in other areas. If you’re missing a specific elemental variant, consulting regional guides or revisiting areas associated with that element increases your chances of encountering the missing variant. Volcanic regions for fire variants, icy mountains for ice variants, and stormy areas or ancient tech locations for electric variants provide logical starting points for targeted hunting.
Mini-boss and elite enemy echoes require you to successfully defeat challenging opponents, and you might need to prepare specifically for these fights if your goal is echo collection rather than just survival. Before engaging a powerful enemy you want to echo, ensure you have the health, equipment, and combat echoes necessary to win the fight, because you need to defeat the enemy before you can add it to your collection. There’s nothing more frustrating than finding a rare enemy variant, engaging it in combat, and then dying before you can claim the echo. Scouting dangerous areas, identifying rare enemies before engaging, and then returning with proper preparation makes elite echo hunting more efficient and less frustrating.
Respawning mechanics affect echo hunting efficiency, particularly for rare enemy variants. Most enemies respawn under specific conditions—typically after Blood Moons or when you leave the area and return after a certain time period. If you’re hunting a specific enemy type that hasn’t spawned in its usual location, try triggering a Blood Moon (if you’re far enough in the game for them to occur) or leaving the area and completing other tasks before returning. Understanding spawn mechanics prevents wasting time searching for enemies that simply haven’t respawned yet and helps you plan efficient hunting routes.
Object Echo Completion Strategies
Object echoes are generally easier to collect than enemy echoes because they don’t require combat, but achieving 100% object echo completion still requires thorough exploration and attention to detail. Make a habit of examining every object you encounter, even if it seems mundane or similar to things you’ve echoed before. Some objects have subtle variants—different colored pots, different wood types for furniture, different stone types for rocks—and the game tracks each variant as a separate echo. Being systematic about echoing objects ensures you don’t miss these subtle differences.
Interior locations like houses, shops, temples, and dungeons often contain unique furniture and decorative echoes not found in the outdoor environment. Taking time to thoroughly explore every building, examining all furniture and decorations, and echoing objects that contribute to each location’s unique character ensures you collect these interior-specific echoes. Some players find it helpful to adopt a policy of echoing everything in every new interior location they visit, making it automatic rather than requiring them to remember to check for unique objects.
Settlement and cultural center exploration is particularly important because different civilizations have unique architectural styles and object types. Goron City’s furniture and objects look distinctly different from those in Zora’s Domain or the Rito settlement, and each location contains exclusive echoes reflecting its culture. Visiting every major settlement and thoroughly exploring them ensures you collect these civilization-specific objects. Don’t just complete the main quest objectives in each location—talk to NPCs, enter every building, and examine the environment to find unique objects that add flavor and distinctiveness to each culture.
Tracking and Verification Methods
Keeping track of which echoes you still need to collect becomes increasingly important as you approach 100% completion and need to identify the last few missing entries. The in-game echo menu provides count information showing how many echoes you’ve collected in each category, and comparing your current count to known total counts helps identify which categories might still have missing echoes. If you have 95 object echoes but the total count is 100, you know you’re missing five object echoes and should focus your search on object hunting rather than enemy echo hunting.
Online resources and community databases can be invaluable for identifying missing echoes once you’re down to the last few stubborn items. Community-compiled echo lists organized by region, enemy type, or object category allow you to systematically check your collection against complete lists to identify exactly what you’re missing. However, it’s often more satisfying to save these resources as a last resort and try to find missing echoes through your own exploration and deduction first. The sense of accomplishment from finally tracking down that last echo you’ve been searching for is much greater when you find it yourself rather than looking up its exact location.
Photo documentation can help track exploration progress and remember locations where you might have seen objects or enemies you didn’t echo at the time. Taking in-game photos of interesting locations, unusual objects, or rare enemies creates a visual record you can review later if you’re hunting for specific echoes. If you remember seeing a unique-looking statue but can’t remember where, scrolling through your photo album might jog your memory and point you back to the correct location. This photographic approach doubles as a nice way to document your journey and creates a visual diary of your adventure alongside its practical echo-hunting utility.

Conclusion
The echo collection system in The Legend of Zelda: Echoes of Wisdom represents one of the most innovative and engaging mechanics in the entire Zelda franchise, transforming Princess Zelda from a damsel in distress into a resourceful hero with a completely unique playstyle that sets this game apart from every other entry in the series. The ability to replicate and summon echoes of objects and enemies you encounter creates a deeply personal adventure where your collection reflects your exploration, your combat choices, and your creative problem-solving approaches.Every echo you collect makes you more powerful not just in a statistical sense, but in a practical sense by expanding your toolkit and enabling new strategies and solutions.
What makes echo collecting so compelling is how naturally it integrates with exploration and progression. You’re not hunting arbitrary collectibles scattered randomly throughout the world—you’re building a library of capabilities by engaging with the environment, fighting enemies, and solving puzzles. Each echo feels earned because you had to discover it, interact with it, and in the case of enemy echoes, defeat it before adding it to your collection. This creates intrinsic motivation for thorough exploration and engagement with the game’s systems rather than relying purely on extrinsic rewards like achievement notifications or completion percentages.
The creative freedom that a complete echo collection provides allows for incredible expression and personalization in how you play Echoes of Wisdom. Two players with identical echo collections might approach the same challenges in completely different ways based on their preferences, playstyles, and creative insights. One player might favor combat-heavy approaches using powerful enemy echoes, while another prefers puzzle-oriented solutions using clever object echo combinations. The game doesn’t judge these different approaches or declare one superior to another—it celebrates the variety and rewards creative thinking regardless of which specific echoes you choose to deploy.
For completionists working toward 100% echo collection, the journey itself becomes a reward as you systematically explore every corner of Hyrule, master every combat encounter, and solve every puzzle the game presents. Finding that last hidden echo after hours of searching, finally defeating that tough enemy to claim its powerful summon, or discovering a secret area containing unique objects creates moments of triumph that punctuate your adventure and make the completion journey memorable beyond just the final percentage number. The echoes you collect become markers of your accomplishments and reminders of specific moments and challenges throughout your adventure.
As you stand with a complete echo collection, having explored every region, defeated every enemy, and examined every object Hyrule has to offer, take pride in what you’ve accomplished. You haven’t just completed a checklist—you’ve thoroughly mastered the game’s signature mechanic and proven yourself as both a skilled player and a thorough explorer. Your complete echo library represents hundreds of discoveries, dozens of challenging fights, and countless creative solutions to puzzles. More than that, it demonstrates your dedication to experiencing everything Echoes of Wisdom has to offer and your appreciation for the innovative mechanics that make this game special.
The echo system proves that Zelda games can continue to innovate and surprise us even after nearly four decades of franchise history. By giving Princess Zelda a completely unique ability set built around replication and summoning rather than traditional combat, Echoes of Wisdom creates an adventure that feels fresh while still honoring the exploration, puzzle-solving, and adventure that define the series. Your complete echo collection stands as evidence that you’ve embraced this innovation and discovered everything the Tri Rod has to offer.
Ready to explore more Echoes of Wisdom secrets and strategies? Check out Nintendo’s official Echoes of Wisdom page for the latest updates and information, or visit IGN’s Echoes of Wisdom wiki for detailed guides and walkthroughs. For community discussions, tips, and echo discovery sharing, the Zelda subreddit offers an active community of players eager to share their findings and creative echo applications.